Menu
That spring-loaded triangle is supposed to point toward the T-junction. Most of the time it does. Sometimes the angle is off because whoever drew it was rushing or the CAD template got corrupted or who knows.
ISO 1219-1 lays out the basic shape but walk into any fabrication shop and you’ll see variations. European drawings pack way more detail into the symbol – pilot stages, adjustment mechanisms, sometimes even the spring constant if the engineer felt like showing off. American schematics keep it stripped down. Neither approach is better, just different, and switching between them mid-project causes headaches.
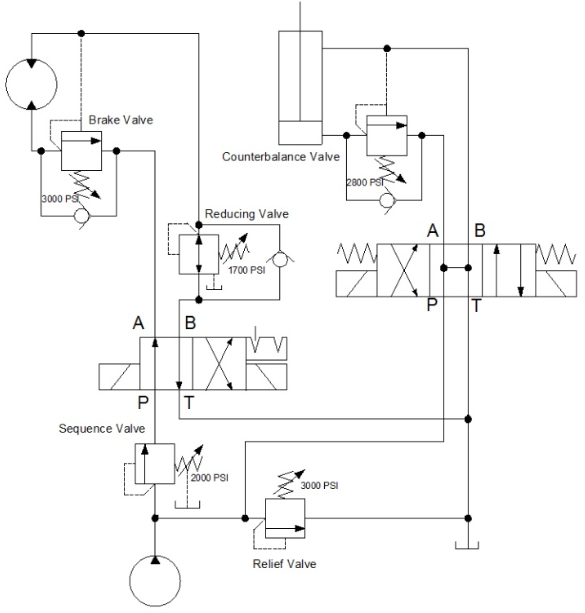
Pressure settings get written next to the symbol. Where exactly depends on who’s drafting. I’ve seen them above the triangle, to the right, sometimes in a separate table three pages away. One guy I worked with put them in a text box with a leader line because he said it looked cleaner. Made the drawings impossible to read at a glance but he was adamant about it.
Bar or psi, occasionally both if the client couldn’t decide which system they preferred. Found a schematic once where someone had crossed out the original pressure rating in red pen and written a new number because they swapped the valve during installation. The CAD file never got updated. Drawing showed 3000 psi, actual valve was rated for 2500. Nobody caught it until the system started acting weird six months later.

Started sometime in the 1980s. Don’t know why, nobody I asked knew why, but that’s how it’s done and changing it now would confuse every mechanic who learned on those drawings. Construction machinery people like putting the model number in a box next to the symbol. Makes sense until you have fifteen relief valves on one schematic and all those boxes start overlapping.
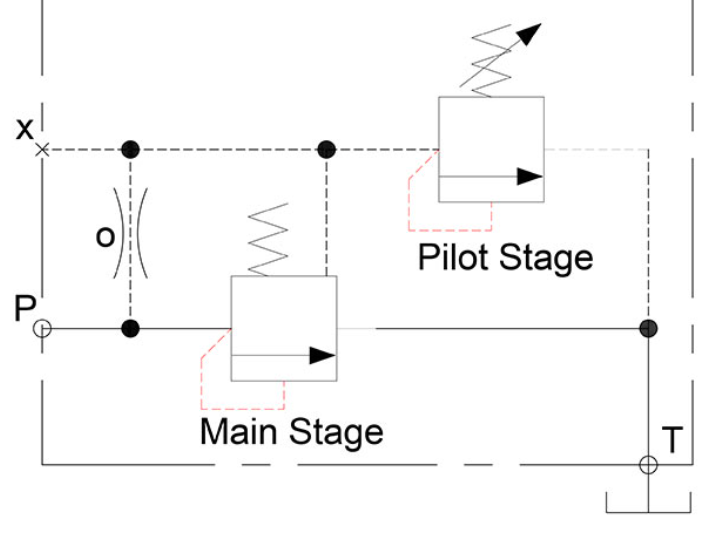
Parker Hannifin says you need different symbols for direct-acting versus pilot-operated relief valves. Most draftsmen ignore that. The pilot line is supposed to show up as a dashed connection but it gets left off half the time to reduce clutter on the drawing. Then a technician is troubleshooting and doesn’t realize there’s a pilot stage affecting the valve behavior.
Temperature compensation data doesn’t appear anywhere on the symbol itself. Lives in specification sheets that may or may not have been created. I’ve opened up systems where the installed valve had completely different temperature ratings than what anyone expected.
Aerospace adds these geometric markers that aren’t in any ISO standard but military contracts require them so there they are. The markers tell you if the valve is flight-critical versus redundant. Matters a lot at altitude. Commercial equipment doesn’t bother with that distinction usually, except when someone copies an aerospace drawing template and forgets to strip out the extra symbols.

P for pressure, T for tank, A and B for work ports. Except British standards prefer numbers instead of letters which throws everyone off. Some symbols show the port labels directly on the valve body, others use leader lines pointing vaguely in the right direction.
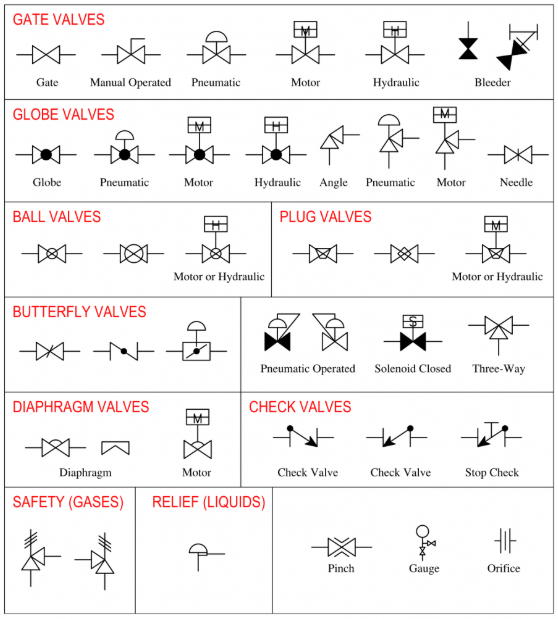
Cross-sections show springs as zigzag lines and poppets as little circles or triangles. Doesn’t look anything like the actual hardware when you take apart a real valve but it communicates function. Quality specifications only require showing internal details if the design is custom or non-standard.
The arrow inside the triangle supposedly indicates flow direction. Works fine for simple poppet designs but balanced piston valves can reverse flow under certain conditions and the symbol doesn’t capture that. Symbols aren’t designed to show every operational possibility.
Mobile equipment manufacturers sometimes add color coding to hydraulic symbols even though most schematics get printed in black and white eventually. The PDF version shows red and blue lines, paper copy is just black. Same drawing, different information depending how you’re looking at it.
AutoCAD ships with hydraulic symbol libraries that use slightly different proportions than SolidWorks. Both companies claim their symbols follow ISO standards. Engineers just grab whatever symbols their software provides without checking if it matches the company’s drafting manual or client requirements.
Third-party symbol libraries all interpret ISO 1219-1 a bit differently. You end up with multiple “correct” versions of what should be the same relief valve symbol. Custom libraries help with internal consistency but make it harder for outside contractors to read your drawings.
Legacy paper drawings get scanned and converted to CAD without anyone verifying the symbols stayed accurate. Scanning introduces errors – spring angles get traced slightly wrong, line weights change, proportions shift. Doesn’t seem like a big deal until someone tries to physically locate a valve based on the drawing and the orientation is backwards.
CE marking in Europe requires documentation about valve specifications but that documentation doesn’t necessarily flow back into the schematic symbols. Separate regulatory requirements in separate file systems. You can have fully compliant hardware with symbology that’s missing information.
Digital drawings allow way more annotation than paper ever did. Relief valve symbols collect construction notes and maintenance tags and revision clouds until the basic symbol disappears under clutter. Trying to distinguish functional information from administrative paperwork becomes difficult.
Drain lines are supposed to be shown explicitly in some specifications even though everyone understands relief valves need a path to tank. Other specifications let you omit the drain line to keep drawings cleaner. A technician looks at a symbol without a drain line and might assume internal drainage when the valve actually needs external plumbing. Could be a minor confusion or a major installation error depending on the specific valve design.

Military projects track every symbol revision with documentation. Commercial work doesn’t unless the customer specifically pays for that level of record keeping. Relief valve symbols get modified five or six times during design iterations and only the final version appears in as-built drawings if those even get created.
Flow capacity ratings show up in liters per minute or gallons per minute. Half the time there’s no unit label so you’re guessing which measurement system the engineer was using. Makes cross-referencing between the drawing and actual hardware catalog unnecessarily complicated when you’re trying to order replacement parts.