
Picture this: Your excavator’s hydraulic line blows at 2 PM on a Friday. The nearest hose shop closes in 90 minutes, and you’re 45 miles from town. Your crew stands idle, burning $150 per hour in lost productivity. This scenario plays out thousands of times daily across construction sites, farms, and industrial facilities worldwide.
The question isn’t whether you’ll face hydraulic hose failure—it’s when. Research shows that 37% of unscheduled downtime for hydraulic machinery stems directly from hose failures, costing operations between $100 and $1,000 per hour depending on equipment type. Having the right repair tools transforms a multi-day crisis into a 15-minute fix.
Before diving into specific tools, you need to understand what hydraulic hose failure actually costs your operation. Most people think about the replacement hose price—maybe $50 to $200. But that’s roughly 2% of the true cost.
When a hose fails on a frontline machine in a mining operation, conservative estimates put annual costs from hose-related downtime at $2.6 million for a mid-sized operation. Even small operations face substantial losses: a single day of equipment downtime for a contractor running injection molding can cost $8,000 in lost production alone.
The real expense pyramid looks like this:
Immediate Costs: Replacement hose, fittings, hydraulic fluid replacement (often 5-20 gallons at $15-30 per gallon), cleanup crew if contamination occurred.
Operational Costs: Equipment sitting idle, crew standing around, project delays, potential penalties for missed deadlines, emergency shipping fees for rush parts.
Secondary Damage: Contaminated hydraulic systems requiring full flushes ($2,000-5,000), pump damage from cavitation due to pressure loss, cylinders scoring from lack of lubrication, collateral damage to electrical systems from fluid spray.
Safety and Regulatory: Potential fluid injection injuries (which can require amputation), environmental cleanup costs averaging $10,000-50,000 for significant spills, OSHA fines for safety violations.
Here’s the revelation: Investing $3,000-5,000 in proper repair tools typically pays for itself after preventing just 2-3 major failures. One construction company I spoke with calculated their portable crimping setup paid for itself in the first month after eliminating two service calls that would have cost $800 each plus four hours of downtime.
Not every operation needs the same tooling level. A farmer with three tractors has different requirements than a mining operation with 40 excavators. The key is matching your tool investment to your equipment’s hydraulic hose failure rate and downtime cost.
I’ve identified five distinct capability levels, each with specific tool requirements and payback timelines. Most operations should aim for Level 2 or 3—these offer the sweet spot of capability versus investment. Levels 4 and 5 make sense only for larger fleets or operations where downtime costs exceed $500 per hour.
Level 1: Emergency Field Repair – For operations with 1-5 machines, occasional hose failures (less than 10 per year), and access to hose shops within 30 minutes. Investment: $150-400. Primary goal: Temporary fixes to limp home.
Level 2: Quick-Fix Independence – For operations with 5-15 machines, moderate failure rates (10-25 per year), or rural locations 30+ minutes from service. Investment: $800-1,500. Primary goal: Permanent repairs of common hose sizes without external help.
Level 3: Full Shop Capability – For operations with 15-30 machines, high failure rates (25-50 per year), or remote locations. Investment: $3,000-6,000. Primary goal: Complete in-house assembly and repair of all standard hoses.
Level 4: Production Workshop – For operations with 30-75 machines, very high failure rates (50-150 per year), or multiple job sites. Investment: $8,000-15,000. Primary goal: Rapid production of replacement hoses with quality control.
Level 5: Mobile Service Fleet – For operations with 75+ machines, extreme failure rates (150+ per year), or vast geographic spread. Investment: $15,000-30,000 per vehicle. Primary goal: Bringing full repair capability to the field.
Most readers fall into Levels 2 or 3. If you’re experiencing more than two hours of hose-related downtime monthly, you’re operating below your optimal capability level. Each level builds on the previous one, so you can start at Level 1 and expand as needs grow.
Level 1 is about buying time, not perfection. These tools let you stop a catastrophic leak long enough to finish a critical task or get equipment back to your shop. Think of this as the hydraulic equivalent of duct tape—temporary, but it prevents a $500 emergency service call.
Hose patch clamps are reusable stainless steel devices that clamp over a damaged section of hose to stop leaks. Quality clamps use 316 cast stainless steel with grade 8 bolts and can handle pressures up to 3,000 PSI. They work by compressing a gasket material around the damaged hose section.
The limitation: These are temporary repairs. Industry data shows patch clamps reduce hose working pressure by 30-40% and should be replaced with proper repairs within 72 hours. However, they excel at getting you through a critical deadline or back to your workshop.
A field repair kit with patch clamps in sizes covering 1/4″ through 3/4″ hoses costs $150-250. The clamps are reusable, making them economical for occasional emergencies. One agricultural contractor reported using the same three-clamp set for seven years, successfully handling 15 emergency situations.
Reusable fittings eliminate the need for crimping equipment. These screw-together fittings work with standard hydraulic hose and use either compression or mechanical grip to seal. Quality reusable fittings can handle the same pressure ratings as crimped assemblies—up to 4,000 PSI for two-wire braid hose.
The catch is assembly time. Where a crimped fitting takes 30 seconds to install, a reusable fitting requires 3-5 minutes of careful assembly. You must cut the hose squarely, clean the inside thoroughly, and torque the fitting to exact specifications. Skip these steps and you’ll have leaks.
A starter kit with four reusable fittings (covering common 1/4″, 3/8″, and 1/2″ sizes) plus the necessary insertion tools costs $200-300. Each additional fitting runs $15-40 depending on size and pressure rating.
Field technicians report success rates above 95% with reusable fittings when proper installation procedures are followed. The failures nearly always trace back to contaminated hose interiors or incorrect torque values.
You can’t install reusable fittings without clean, square cuts. A hydraulic hose cutter designed specifically for rubber hose makes this possible. Standard utility knives create ragged edges that won’t seal properly and can introduce rubber particles into your hydraulic system.
Quality hose cutters use a ratcheting mechanism that progressively cuts through the reinforcement layers without crushing them. The best models handle hoses up to 1-1/4″ diameter and cost $40-80. Cheaper models under $25 typically fail after 20-30 cuts as the blade dulls.
You also need measurement tools: a quality tape measure for hose length and a caliper for measuring hose outside diameter. Calipers are critical because hydraulic hose sizing uses inside diameter, but you often measure outside diameter in the field to identify the correct replacement size. A decent digital caliper costs $25-40.
A wire brush for cleaning hose ends before fitting installation rounds out the basic toolkit. The total investment for cutting and measurement tools: $80-130.
Level 1 tools won’t make you independent. They’re insurance against worst-case scenarios. I talked with a small excavation contractor who spent $325 on Level 1 tools and used them twice in 18 months. Each time saved him a $450 emergency callout and three hours of downtime. The math worked in his favor even with minimal use.
If you’re facing hose failures more than quarterly, Level 1 won’t cut it. You need the capability to make permanent repairs, which requires moving up the ladder.
Level 2 changes the game. Instead of temporary patches, you’re making permanent repairs that match factory quality. This level suits operations where hose failures occur regularly enough to justify the investment but not so frequently that you need dedicated shop space.
The centerpiece of Level 2 is a portable hydraulic crimper.
Portable crimpers compress fittings onto hoses using either manual hydraulic force or small electric pumps. The critical specification is crimp diameter capacity—most portable units handle hoses from 1/4″ through 3/4″, covering roughly 80% of agricultural and light construction applications.
Modern portable crimpers like the EZ-Crimper use rotating bearing systems that eliminate the need for dies, collets, or rings. The bearings crimp the fitting radially in a single operation, creating a uniform connection that meets SAE and DIN specifications. The design is elegant: four precision bearings compress the fitting evenly around its circumference, producing a smooth surface without the ridges that can crack under pressure cycles.
The price range varies dramatically. Basic manual crimpers start at $600, while sophisticated units with digital pressure gauges and automatic crimp control run $1,200-1,800. The difference shows in crimp consistency. Manual units require operator skill to judge when the crimp reaches sufficient pressure. Digital units remove guesswork by automatically stopping at the correct crimp diameter for each fitting size.
Field data shows that trained operators achieve 98%+ success rates with digital crimpers versus 85-90% with basic manual units. The 10-15% gap represents rework and potential failures—not acceptable when your excavator is waiting.
Weight matters significantly for portable crimpers. Units weighing less than 30 pounds allow one person to carry them to the field. Heavier crimpers become shop-bound despite being labeled “portable.” The lightest professional-grade units weigh around 25 pounds and still handle up to 3/4″ hose.
Level 2 demands better cutting than Level 1’s basic cutters. You need clean, square cuts with no burrs or contamination that could compromise the crimp seal or introduce particles into your hydraulic system.
Professional hose cutters use one of two mechanisms. Guillotine cutters slice straight through the hose in one motion, ideal for softer hoses up to 1″. Saw-type cutters like the Clean-Cuts system use a toothed blade that bends the hose into the cutting edge, spreading the cut to avoid heat buildup and smoking. The latter works better for larger hoses with heavy wire reinforcement.
Expect to spend $150-300 for a quality hose cutter that’ll handle years of regular use. The investment seems steep until you consider that a single bad cut can ruin a $100 hose and fitting set.
Here’s what most guides skip: contamination from cutting is the number one cause of premature failure in field-assembled hoses. When you cut through wire-reinforced hose, you create metal particles and rubber dust that lodge inside the hose tube. One study found that 60% of failed field-assembled hoses contained metallic debris from the cutting process.
Professional hose cleaning uses pneumatic projectile launchers. These devices shoot foam projectiles through the hose using compressed air, carrying out debris. A basic bench-mount launcher costs $200-400 and handles hoses from 1/4″ to 1-1/4″. The projectiles cost about $2 each and are reusable 10-15 times.
The cleaning process takes 30 seconds and eliminates the contamination risk that can cause valve failures, pump scoring, or blocked orifices downstream. Some operators skip this step to save time. They’re gambling with their hydraulic system’s lifespan.
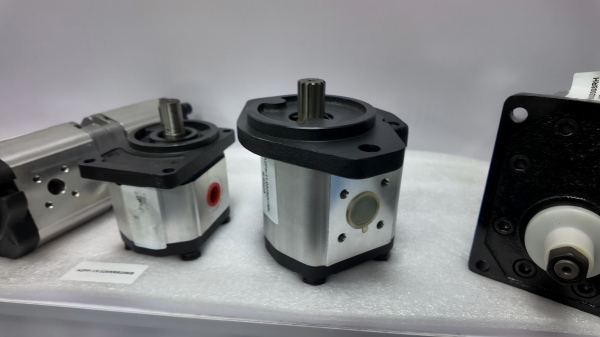
Crimping equipment is useless without fittings. Level 2 operations need a curated inventory of common fittings and hose. The challenge is predicting which sizes you’ll need without tying up excessive capital in inventory.
Start by auditing your equipment. List every hydraulic hose diameter and end fitting type across all machines. You’ll typically find 5-8 common combinations that represent 80% of your hose failures. Stock those sizes in depth—three complete assemblies worth of fittings and 20-30 feet of bulk hose for each size.
For a typical small construction operation, this inventory runs $800-1,200. Large operations with diverse equipment might spend $2,000-3,000. The key is avoiding the trap of stocking everything, which locks up $10,000+ in slow-moving inventory.
Proper storage matters. Hydraulic hose has a shelf life of about ten years if stored correctly—out of direct sunlight, away from ozone-generating equipment, and at moderate temperatures. Fittings are less sensitive but should be kept clean and organized. A simple reel rack system with labeled bins costs $300-500 and prevents the “dig through a pile” approach that wastes time.
Total Level 2 investment: $800-1,500 depending on crimper choice and inventory depth. Payback calculation is straightforward. Each avoided service call saves $200-500 in service charges plus 1-4 hours of downtime. If your operation loses $100 per downtime hour, you break even after 4-6 avoided service calls.
A landscaping company with 12 excavators and skid steers tracked their results after implementing Level 2 capability. Previous to having their own tools, they averaged 18 hose-related service calls annually at $350 average cost plus three hours average downtime ($300 lost productivity). Total annual cost: $11,700.
After implementing Level 2, they handled all but three repairs (unusual sizes) in-house. Annual cost dropped to three service calls ($1,050) plus tool amortization ($300 annually over five years) plus fittings and hose ($1,400). New total: $2,750. Annual savings: $8,950.
The math gets even better in remote locations where service calls include $100-200 travel charges and 4+ hour response times.
Level 3 represents true independence. You’re not just fixing failures—you’re fabricating custom hoses, preventatively replacing aging hoses before they fail, and possibly offering service to other nearby operations. This level makes sense for larger fleets or operations where hydraulic downtime costs exceed $200 per hour.
The jump from portable to benchtop crimpers brings precision, consistency, and capacity. Modern benchtop crimpers are digital marvels that remove human error from the equation. Units like the Gates GC20 with Cortex Intelligence feature touchscreens, pre-programmed crimp specifications for thousands of hose and fitting combinations, and pressure sensors that ensure every crimp meets factory specifications.
These systems work by looking up the hose type and fitting in an internal database, then automatically setting the exact crimp diameter needed. The operator simply positions the assembly, presses start, and the machine handles everything. Crimp time is typically 20-30 seconds, and success rates exceed 99.5% when operators follow basic procedures.
The capacity difference is substantial. While portable crimpers typically max out at 3/4″ hose, benchtop units handle up to 2″ hose depending on model. This covers virtually all mobile hydraulic applications and many industrial fixed-system hoses.
Benchtop crimpers range from $2,500 for basic units without digital features to $8,000 for fully intelligent systems with touchscreens, automatic crimp control, and data logging. The higher-end units justify their cost through consistency. When you’re crimping 50-100 hoses monthly, the difference between 99.5% and 95% success rates is significant—that’s 2-3 versus 5 rework jobs monthly.
Installation requires a sturdy workbench (the machines weigh 200-400 pounds) and typically 110V electrical service. Some units need compressed air for auxiliary functions. Plan for a dedicated 4-foot by 6-foot workspace.
Level 3 cutting goes beyond handheld tools to bench-mounted systems that guarantee square, clean cuts every time. These saws use abrasive blades specifically designed for rubber and steel reinforcement. The blade doesn’t actually remove material (no kerf) but rather parts the hose layers through a combination of cutting and spreading action.
Quality bench saws handle hoses up to 2″ diameter and include clamping systems that hold the hose perpendicular to the blade. This ensures square cuts, which are critical for proper fitting seating. Cuts that are off-square by even 2-3 degrees can compromise crimp integrity.
A professional hose saw runs $600-1,200 depending on capacity. Some operations opt for a simpler approach using a metal cut-off saw with a hydraulic hose blade, which works acceptably for $200-400 if you add a jig to ensure square cuts.
Level 3 operations need more robust cleaning than the basic projectile launcher. Bench-mounted units include multiple projectile nozzles (covering 1/4″ through 1-1/4″ hose), air filtration to keep debris out of the hose, and pneumatic foot switches for hands-free operation.
These systems can clean a hose in under 20 seconds and cost $400-700. The air filter is crucial—without it, you’re potentially blowing workshop dust and moisture into hoses you just cut. The 5-micron filters used in quality systems cost $15-30 and need replacement every 200-300 hoses.
Some high-end systems include capping stations that automatically seal hose ends after cleaning to prevent contamination during storage. This matters for shops building inventory of pre-made assemblies.
Here’s where many operations stumble: identifying hydraulic fittings accurately. Hydraulic fittings come in dozens of thread types—NPT (National Pipe Thread), JIC (Joint Industry Council), ORFS (O-Ring Face Seal), BSPP (British Standard Pipe Parallel), BSPT (British Standard Pipe Tapered), SAE, DIN, Komatsu, and Japanese varieties.
A thread identification kit contains male and female gauges for each thread type. You thread the gauge onto the unknown fitting—the one that threads smoothly identifies the type. These kits cost $200-400 and eliminate the guessing that leads to cross-threading and damaged fittings.
Pair the thread ID kit with a comprehensive fitting catalog or identification app. Several hose manufacturers now offer smartphone apps where you photograph a fitting and AI identifies it. These apps aren’t perfect (maybe 85% accuracy in my testing) but they’re getting better and serve as a good first check before using physical gauges.
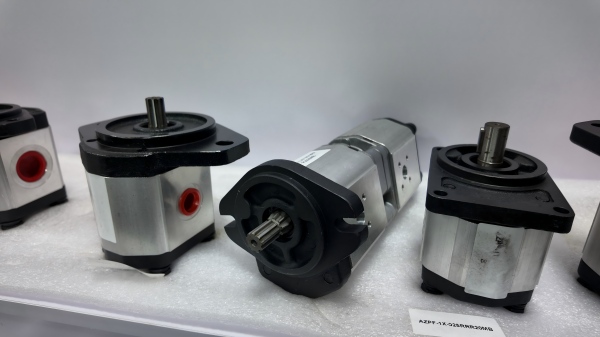
Level 3 inventory differs from Level 2 in breadth and depth. You’re stocking not just your fleet’s common sizes but also unusual fittings that allow you to handle uncommon repair situations. A Level 3 inventory typically includes:
Hose: Bulk hose in 8-10 common sizes, with 50-100 feet of the most common sizes and 20-30 feet of less common ones. Total investment: $1,500-2,500.
Fittings: At least five of each common fitting, 2-3 of less common fittings. This requires tracking fitting types across your fleet and organizing them in a manner that allows quick access. Labeled bins or drawer systems are essential. Investment: $2,000-4,000.
Adapters and Couplers: These are the forgotten items that cause delays. Need to connect 1/2″ JIC to 3/8″ NPT? Without the right adapter, you’re stuck. A comprehensive adapter set covering common conversions costs $500-800.
Quick Disconnects: For equipment with frequently changed attachments. Investment: $300-600.
A good practice is implementing a min/max inventory system. When a hose size drops below its minimum quantity, trigger a reorder. This prevents stockouts without excessive inventory investment. Digital inventory apps can track usage patterns and predict when reorders are needed.
Total Level 3 investment: $3,000-6,000 depending heavily on crimper choice and inventory depth. This seems substantial until you consider capability and cost avoidance.
A mid-sized excavation contractor with 24 machines implemented Level 3 tools after calculating they spent $27,000 annually on hose-related downtime and service calls. Post-implementation, they handled 98% of repairs in-house, reducing external costs to $3,000 annually. Tool amortization over seven years added $850 annually, and consumables (hose, fittings) cost $4,500 annually.
New total: $8,350. Annual savings: $18,650. Additionally, they began servicing three neighboring operations, generating $12,000 in annual side revenue that helped offset equipment costs.
The capability also enabled preventive replacement. Rather than waiting for hoses to fail, they began inspecting hoses during routine maintenance and replacing any showing wear. This cut unexpected failures by 75%, dramatically reducing the most expensive downtime events.
Levels 4 and 5 are for large operations or dedicated hydraulic service businesses. The tool requirements expand beyond basic repair into production fabrication, quality control, and mobile service capability. I’ll cover these briefly since most readers won’t need this level.
At 50+ hoses monthly, you need production efficiency. This means multiple crimping stations, organized workflow, quality control testing, and typically a dedicated technician or two. Equipment adds up: backup crimpers ($3,000-5,000), pressure testing equipment ($1,500-3,000), organized storage systems ($2,000-4,000), and extensive inventory ($8,000-15,000).
The key addition is hose testing capability. Pressure testing newly assembled hoses to 150% of rated pressure for 30 seconds identifies weak crimps before they fail in service. Commercial pressure test stands cost $1,500-3,000 but can save tens of thousands in warranty claims and field failures.
Total Level 4 investment: $8,000-15,000.
Operating across multiple remote sites or servicing external customers requires bringing the shop to the field. This means equipping service vehicles with portable crimpers, cutting tools, cleaning equipment, and substantial hose and fitting inventory.
A properly equipped mobile service vehicle runs $15,000-30,000 for tools and inventory alone, plus the vehicle cost. However, it eliminates the single largest complaint about hydraulic repairs: response time. A mining operation with mobile service capability can respond to failures in 15-30 minutes versus 2-4 hours waiting for external service.
The economics work when downtime costs exceed $500 per hour and you’re geographically spread across multiple sites.
You’ve seen the ladder. Now how do you determine which level fits your operation? Here’s a practical decision framework that removes guesswork.
Question 1: What’s your annual hydraulic hose failure rate?
Count every hose failure over the past 12 months. Include planned replacements during maintenance. If you don’t track this, estimate conservatively using one failure per machine per year as a baseline for equipment 3-7 years old. Newer equipment: 0.5 failures per machine annually. Older equipment (8+ years): 2-3 failures per machine annually.
Question 2: What does one hour of downtime cost?
This is actual cost, not just operator wages. Include: lost production value, crew standing idle, delayed project timelines, potential penalties, and overhead allocation. Most construction operations land between $150-400 per hour. Agricultural operations: $100-250 per hour. Mining and industrial: $400-1,000+ per hour.
Question 3: How far is your nearest competent hose service?
Measure drive time, not distance. Under 30 minutes: external service remains viable. 30-60 minutes: Level 2 likely justified. Over 60 minutes: Level 3 minimum unless your failure rate is very low.
Scenario A: Less than 10 failures annually, downtime cost under $200/hour, service within 30 minutes. Recommendation: Level 1. Your external service costs likely total $2,000-4,000 annually. Level 1 tools ($150-400) provide insurance against after-hours or weekend failures but probably won’t pay for themselves purely on economics. Think of it as operational insurance.
Scenario B: 10-30 failures annually, downtime cost $150-400/hour, service 30-60 minutes away. Recommendation: Level 2. You’re spending $3,500-10,500 annually on service plus downtime costs. Level 2 tools ($800-1,500) pay for themselves in 3-6 months. This is the economic sweet spot for most mid-sized operations.
Scenario C: 30-75 failures annually, downtime cost over $300/hour, any distance to service. Recommendation: Level 3. External service costs plus downtime easily exceed $15,000-25,000 annually. Level 3 tools ($3,000-6,000) pay back in 4-8 months and provide capability to implement preventive replacement strategies.
Scenario D: Over 75 failures annually, downtime cost over $400/hour, especially if spread across multiple sites. Recommendation: Level 4 or 5. At this scale, hydraulic management is a significant operational function requiring dedicated resources.
Mistake 1: Buying the cheapest crimper. Off-brand crimpers under $400 often can’t maintain consistent crimp pressure or lack proper sizing guides. The $200 you save costs you when 15% of crimps leak and require rework. Buy known brands: Gates, Parker, Uniflex, Continental, or EZ-Crimper.
Mistake 2: Skipping hose cleaning equipment. The $200-400 savings seems smart until contamination causes a $3,000 pump failure three months later. Cleaning equipment isn’t optional—it’s insurance for your hydraulic system.
Mistake 3: Inadequate inventory. Having a crimper but not the right fittings is like having a truck without fuel. Plan for 3x your typical monthly usage as a minimum inventory level. You can’t predict which size will fail next.
Mistake 4: Not training operators. Tools without training produce garbage results. Allocate time for proper training, either through manufacturer-provided resources or experienced technicians. The investment is a few hours, and it’s the difference between 95% and 50% success rates.
Mistake 5: Ignoring used equipment. Quality used hydraulic crimpers can save 40-60% versus new, and they’ll last decades with minimal maintenance. Check auction sites, shop closures, and equipment rental companies upgrading their fleet. Inspect carefully, but don’t dismiss used equipment categorically.
Hydraulic repair tools can last 20+ years with proper care. Here’s what requires attention:
Crimpers: Clean crimp dies or bearings after every 10-15 crimps using a wire brush. Lubricate moving parts monthly if used regularly. On bench units, check hydraulic fluid level quarterly. Expect to replace seals every 5-7 years ($200-400) and hydraulic fluid every 2-3 years ($50-100).
Cutting equipment: Blade sharpening or replacement every 200-500 cuts depending on hose sizes. Ratchet mechanisms may need lubrication annually. Budget $100-150 annually for blade replacement.
Cleaning equipment: Replace projectiles when they show significant wear (rough edges, deformation). Air filters need replacement every 200-300 hoses or when visibly dirty. Check pneumatic connections for leaks semi-annually.
Inventory: Inspect stored hose annually for weather checking (fine cracks in the outer cover). Hose showing weather checking is compromised and should be discarded. Rotate stock to use older inventory first. Mark hose with manufacture date using paint pen.
Most operators budget 10% of initial tool investment annually for maintenance and consumables. A Level 2 setup costing $1,200 should expect $120 annually in ongoing costs. Level 3 at $5,000 investment: $500 annually.
Hydraulic repair carries real risks. Pressurized systems can inject fluid through skin at velocities exceeding 400 miles per hour—roughly the speed of sound. I’m not exaggerating for effect. Medical literature documents hundreds of hydraulic injection injuries annually, many resulting in amputation.
Personal Protective Equipment: Safety glasses with side shields (not just reading glasses), nitrile gloves resistant to hydraulic fluid, long sleeves, steel-toed boots. Many operators skip gloves thinking they’ll interfere with fine work. That’s gambling with your hands. Quality nitrile gloves don’t significantly impair dexterity.
Pressure Relief: Before disconnecting any hydraulic line, the system must be depressurized completely. This means shutting down equipment, cycling hydraulic functions to release trapped pressure, and waiting 5-10 minutes for residual pressure to bleed off. Impatience at this stage causes injuries.
Leak Detection: Never use your hands to check for leaks on pressurized systems. Use cardboard or paper held in a gloved hand. High-pressure pinhole leaks are invisible and can inject fluid into your hand before you feel anything. If you suspect a leak, depressurize the system before investigating.
Clean Work Area: Hydraulic fluid is slippery. A spill becomes a fall hazard within seconds. Keep absorbent materials nearby and clean spills immediately. Many shops keep 50-pound bags of absorbent clay or commercial spill pads.
Proper Ventilation: Some hydraulic fluids release vapors when heated. Work areas need adequate ventilation to prevent headaches and respiratory irritation.
After assembling a hydraulic hose, proper testing catches problems before they cause failures:
Visual Inspection: Check that the crimp is centered on the fitting and shows no gaps between the hose and fitting shell. The crimp surface should be smooth without cracks or severe ridges. Look for hose reinforcement wires protruding from either end (indicates improper cutting or sizing).
Pressure Testing: If you have test equipment, pressure-test new assemblies to 150% of rated working pressure for 30 seconds. Watch for leaks at both crimps and along the hose body. Even slow seeps indicate problems—hydraulic systems have no tolerance for leaks.
Installation Testing: After installing a repaired hose, run the equipment through a full cycle of hydraulic functions while observing the new hose. Look for weeping at fittings, hose movement indicating poor routing, and any kinks or twists that developed during installation.
Take testing seriously. A failed test reveals problems in your workshop where they’re easy to fix. A failed hose in service reveals problems when your excavator is 40 feet in the air or your baler is processing a 30-acre field.
Having tools means nothing if nobody knows how to use them properly. A portable crimper in the hands of an untrained operator produces worse results than calling a professional service.
Most major manufacturers offer free training resources. Gates, Parker, and Continental all provide online video libraries covering hose selection, cutting, cleaning, and crimping. These aren’t marketing fluff—they’re detailed technical guides developed by engineers who understand the systems.
Hands-on training pays dividends. Many hydraulic distributors offer half-day or full-day workshops, often free with equipment purchase. A trained operator crimping 10 practice assemblies under supervision builds muscle memory that prevents expensive mistakes.
For smaller operations without formal training access, YouTube contains solid content if you’re selective. Look for videos from manufacturers or experienced technicians, not random attempts by people figuring it out as they go. The difference is obvious—professionals explain why each step matters, not just what to do.
Practice on scrap hose before doing critical repairs. Sacrifice $50 in hose and fittings to build confidence. Cut a dozen practice hoses, crimp a dozen practice fittings, and pressure-test the results if possible. The experience is invaluable when you’re facing a real repair situation.
Mistake 1: Not cutting square. Angled cuts prevent proper fitting insertion and compromise the crimp seal. Solution: Use a cutting guide or bench-mounted saw. If hand-cutting, mark the cut line completely around the hose with a marker, then check that you’re following it.
Mistake 2: Skipping cleaning. Metal particles from cutting scratch cylinder walls and score pumps. Solution: Clean every hose, every time. No exceptions. The 30 seconds invested prevents thousands in damage.
Mistake 3: Wrong crimp diameter. Over-crimping cracks fittings, under-crimping allows blow-offs. Solution: Use crimpers with crimp diameter gauges or pre-programmed settings. If using manual crimpers, purchase a crimp diameter gauge ($40-80) and follow manufacturer specifications exactly.
Mistake 4: Reusing fittings. Crimped fittings are one-time-use. The crimp permanently deforms the fitting shell. Solution: Always use new fittings. Trying to save $15 risks a $1,000 failure.
Mistake 5: Ignoring hose length changes. Hydraulic hose contracts and expands under pressure, typically 2-4% length change. Solution: Measure the old hose while installed and under pressure if possible. Add 2-3% to the measurement for proper slack.
Mistake 6: Poor routing. Routing replacement hoses too tight or with sharp bends creates stress points that fail prematurely. Solution: Follow the old hose’s path if it wasn’t problematic. Ensure the hose doesn’t stretch tight when hydraulics are fully extended. Maintain minimum bend radius—typically 10x hose diameter.
You’ve got the information. Now comes the hard part: justifying the expense to whoever controls the budget. Here’s how to build a compelling case.
Start with historical data. Calculate your previous 12 months’ actual spending on hydraulic hose issues. Include:
This total is your baseline annual cost. For most operations, it’s shockingly high—often $5,000-25,000 depending on fleet size.
Next, project post-implementation costs. Estimate you’ll handle 85-90% of failures in-house after implementing Level 2 or 3. The remaining 10-15% represents unusual sizes or complex assemblies where external service makes sense. Add:
The difference is your annual savings. Divide the tool investment by annual savings to get payback period. If it’s under 12 months, the investment is a no-brainer. Under 24 months is still excellent. Beyond 36 months, reconsider your operational level or examine whether you’ve accurately captured downtime costs.
Can’t swing the full investment immediately? Phase it. Start with Level 1 emergency tools ($150-400) to handle after-hours and weekend disasters. After 3-6 months, analyze how many situations the Level 1 tools resolved versus how many still required service calls.
If you’re consistently calling for service despite having Level 1 tools, that’s data supporting the jump to Level 2. Budget for the portable crimper and expanding your fitting inventory. Track results for another six months.
This phased approach spreads costs across multiple budget cycles and builds empirical data proving each level’s value before advancing to the next.
Many hydraulic equipment suppliers offer financing or lease options for crimping equipment. A $5,000 bench crimper might finance at $125 monthly over 48 months. Compare this monthly cost against your monthly service call spending. If you’re averaging $300+ monthly in service calls, the financing is cash-flow positive from month one.
Equipment leasing can make sense for operations uncertain about long-term needs. A 36-month lease on a $5,000 crimper might run $175 monthly. At lease end, you typically have options to purchase, renew, or return the equipment. This works well for operations in growth phases where hydraulic repair needs might evolve.
Having the right tools is necessary but not sufficient. Tools without systems produce inconsistent results and stockouts at critical moments. Here’s what surrounds effective tool use:
Track which hose sizes and fitting types you use most frequently. Most operations find that 3-4 hose sizes represent 70% of failures. Stock these deeply. Less common sizes can be kept in smaller quantities or ordered as needed from next-day distributors.
Implement a simple reorder system. When a particular hose size drops below three complete assemblies worth, trigger a reorder. This prevents the frustrating situation of having tools but missing the 3/8″ JIC fitting needed for the immediate repair.
Consider vendor-managed inventory for larger operations. Some hydraulic suppliers will stock inventory at your location, tracking usage and automatically replenishing. You pay only for what you use. This eliminates inventory carrying costs while ensuring availability.
Create simple one-page guides for common repairs. Include: proper cutting technique, cleaning procedure, crimp specifications for your equipment, and safety checks. Laminate these and post them at your repair station. This ensures consistent technique even as personnel change.
Photograph or label your equipment’s hydraulic hoses during initial documentation. Note hose size, length, and fitting types. When a hose fails, you immediately know which replacement components to grab rather than removing the failed hose, measuring it, and then discovering you don’t have the right fittings.
Train multiple people. If only one person knows how to use the equipment, you’re vulnerable when that person is unavailable. Cross-train at least two people for redundancy.
The best repair is the one you don’t need. After implementing repair capability, consider preventive replacement of aging hoses during scheduled maintenance. Hoses showing surface cracks, extensive abrasion, or reaching 7-10 years old are candidates for proactive replacement.
Some operations mark hoses with manufacture date codes during initial installation. This lets maintenance crews quickly identify old hoses during routine inspections. The incremental cost of replacing a questionable hose during planned maintenance is minimal—maybe $30-80. The cost of that same hose failing during operation is $300-800 when you factor in downtime.
Hydraulic hose repair capability is infrastructure, not expense. It’s like having a spare tire in your truck or a backup generator at your facility. The value isn’t in daily use—it’s in transforming catastrophic failures into minor inconveniences.
Operations that implement proper repair capability report not just cost savings but behavioral changes. Operators become more attentive to hose condition because they know repairs are quick. Maintenance teams shift from reactive to proactive as they gain confidence in their ability to handle issues. Project managers bid more aggressively knowing hydraulic failures won’t derail timelines.
The question isn’t whether you’ll invest in repair capability—it’s whether you’ll do it before or after the next expensive failure. Every day your equipment runs is another day closer to the next hose failure. The statistics are clear: 37% of unscheduled downtime comes from hydraulic hoses. You can either control that statistic or let it control you.
No, with rare exceptions. Automotive crimpers are designed for lower-pressure applications like fuel lines (50-100 PSI) and coolant hoses. Hydraulic systems operate at 1,000-5,000 PSI—sometimes higher. Automotive crimpers can’t generate sufficient force to properly compress hydraulic fittings, resulting in leaks or blow-offs. The $200 you’d save using an automotive crimper becomes a $2,000 mistake when the improperly crimped hose fails and contaminates your hydraulic system. Use equipment rated for hydraulic pressure specifications.
Maximum 72 hours under normal operation, or longer only if you’re operating at significantly reduced pressure. Hose patch clamps are emergency solutions that reduce hose working pressure by 30-40%. They work by compressing a gasket around the damaged section, but they can’t match the structural integrity of a proper repair. If you’re more than three days from permanent repair, you should consider temporarily replacing the entire hose with a spare assembly rather than continuing with the patch. Extended patch use risks failure at the worst possible moment.
The reinforcement layer count. One-wire braid hose (SAE 100R1) has a single layer of braided steel wire reinforcement and is rated for approximately 3,000-4,000 PSI depending on size. Two-wire braid (SAE 100R2) has two layers of braided wire and handles 4,000-6,000 PSI. Two-wire hose is more resistant to pressure spikes and has longer service life, but it’s 30-40% more expensive and requires larger minimum bend radius. For most mobile equipment, two-wire is the better choice despite higher initial cost because it lasts longer under dynamic conditions with frequent pressure cycling.
You can repair mid-hose using mender couplings—special fittings designed to join two hose sections. Cut out the damaged section, attach mender couplings to both new ends, and join them with a short section of new hose. This works well when the damaged section is far from the original fittings and removing the entire hose is difficult. However, mended hoses have two additional connection points, each a potential leak location. When feasible, full hose replacement is more reliable than mending. Use menders for emergency repairs or when removing the hose is impractical due to equipment disassembly requirements.
Inspect systematically. First, check the cover for deep abrasion, cracks, or blisters. Deep abrasion exposing reinforcement wire means discard. Second, flex the hose—it should bend smoothly without kinking or making cracking sounds. Cracking sounds indicate the inner tube has hardened from heat exposure. Third, look inside both ends using a flashlight. The inner tube should be smooth without cracks, roughness, or contamination buildup. Fourth, check manufacturing date codes (usually stamped on the cover). Hoses over 10 years old should be replaced regardless of appearance—rubber degrades over time even without visible damage. If the hose passes all four checks and was removed for reasons unrelated to hose condition (equipment modification, etc.), it’s probably safe to reuse. When in doubt, replacement cost is negligible compared to failure risk.
Mostly no, but with important exceptions. Standard hydraulic crimpers work with both rubber and thermoplastic hoses in most sizes. However, thermoplastic hose fittings sometimes require different crimping specifications—different diameter compression for proper seal. If your crimper has manual diameter setting, you’ll need the thermoplastic specifications from the fitting manufacturer. Digital crimpers with built-in specifications automatically adjust. For cutting, thermoplastic hose is actually easier—it’s less abrasive on cutting blades and produces cleaner cuts. Some thermoplastic hoses use push-on fittings instead of crimped fittings, which require different installation tools (usually a push-on arbor press, $200-400). Check what hose types your equipment uses before investing in tools.
Absolutely not. Crimping permanently deforms both the fitting and the hose structure. A second crimp doesn’t fix the first—it creates additional distortion that weakens the assembly. If a crimp is visibly wrong (off-center, incomplete, or gaps between fitting and hose), the only safe course is cutting off the fitting, trimming the damaged hose section, and starting fresh with a new fitting. This is frustrating and expensive—a single mistake can waste $20-50 in materials. This is precisely why proper training and using crimpers with crimp diameter settings are important. Getting it right the first time is much cheaper than trial and error.
A thread identification kit is essential—about $200-400 for a comprehensive set covering all common thread types (NPT, JIC, ORFS, BSPP, BSPT, metric, etc.). These kits contain male and female gauges that thread onto fittings. The one that threads smoothly without force identifies the thread type. Beyond thread ID, you need measuring tools: calipers for outside diameter, a ruler for length measurements, and a thread pitch gauge ($10-20) for determining threads per inch. Take clear photos of unusual fittings from multiple angles and send them to hydraulic suppliers—experienced counterpersons can often identify fittings from photos. Modern smartphone apps are improving at identification but still only work about 85% of the time in my experience. The combination of physical gauges and expert consultation handles 99% of identification challenges.